

We have a mixed bag of passions within the Tom’s Guide fitness team, from personal trainers and running experts to wearable gurus and outdoor fanatics; it’s what makes us confident that we can give you the best advice for your fitness journey.
Three of my colleagues love running; I’m a personal trainer who mixes Pilates, yoga and weightlifting; another colleague adores getting outdoors to snowboard, hike and bike. While we all have our varying approaches to staying fit, there’s at least one area we all agree on: hip mobility.
Unlocking tight hips is the key to improving range of motion and movement mechanics, injury-prevention and performance. Whether you’re hitting the slopes during winter or knocking out a marathon PB, the everyday gym-goer through to the elite athlete can (and will) benefit from strengthening their hips.
You may like
So, I asked my colleagues what the best hip exercises are — and these are the four moves we all swear by for relieving tight hips and boosting hip mobility.
4 hip stretches you need to know about
Relieving tight hip flexors can be done through stretching and mobility routines. The former can help reduce tight hips and build flexibility; the latter increases range of motion and builds strength through controlled motion.
I like to do both — I typically save static stretching for cool-downs, while active stretches and dynamic mobility drills make it into my warm-up routines. My colleagues agree. I asked them, “Can you send over a hip exercise you swear by?” and this is what they told me (plus, one spicy movement of my own).
1. Figure-4 stretch
The only one I use regularly is the figure-4 stretch.
“The only one I use regularly is the figure-4 stretch,” says Jane McGuire, our senior fitness editor at Tom’s Guide. This is a brilliant stretch for sciatica.
Figure-4 relieves tightness in your hips and stretches the gluteal muscles, reducing lower-body tension in minutes. You can adapt this exercise to suit your ability — seated figure-4 involves sitting as you perform the exercise, which can feel more intense, and you can make this even more challenging by moving your grounded foot closer toward your body.
Supine figure-4 (lying on your back, demonstrated above) feels more accessible for most people. Remember not to force your knee outward and only move as deeply into the stretch as your muscles allow.

Jane McGuire
Senior fitness editor
Jane manages the fitness team at Tom’s Guide and is a keen runner, having completed multiple marathons. She can be found testing the latest running gear and wearables while testing workouts and reporting on what’s new in the world of fitness.
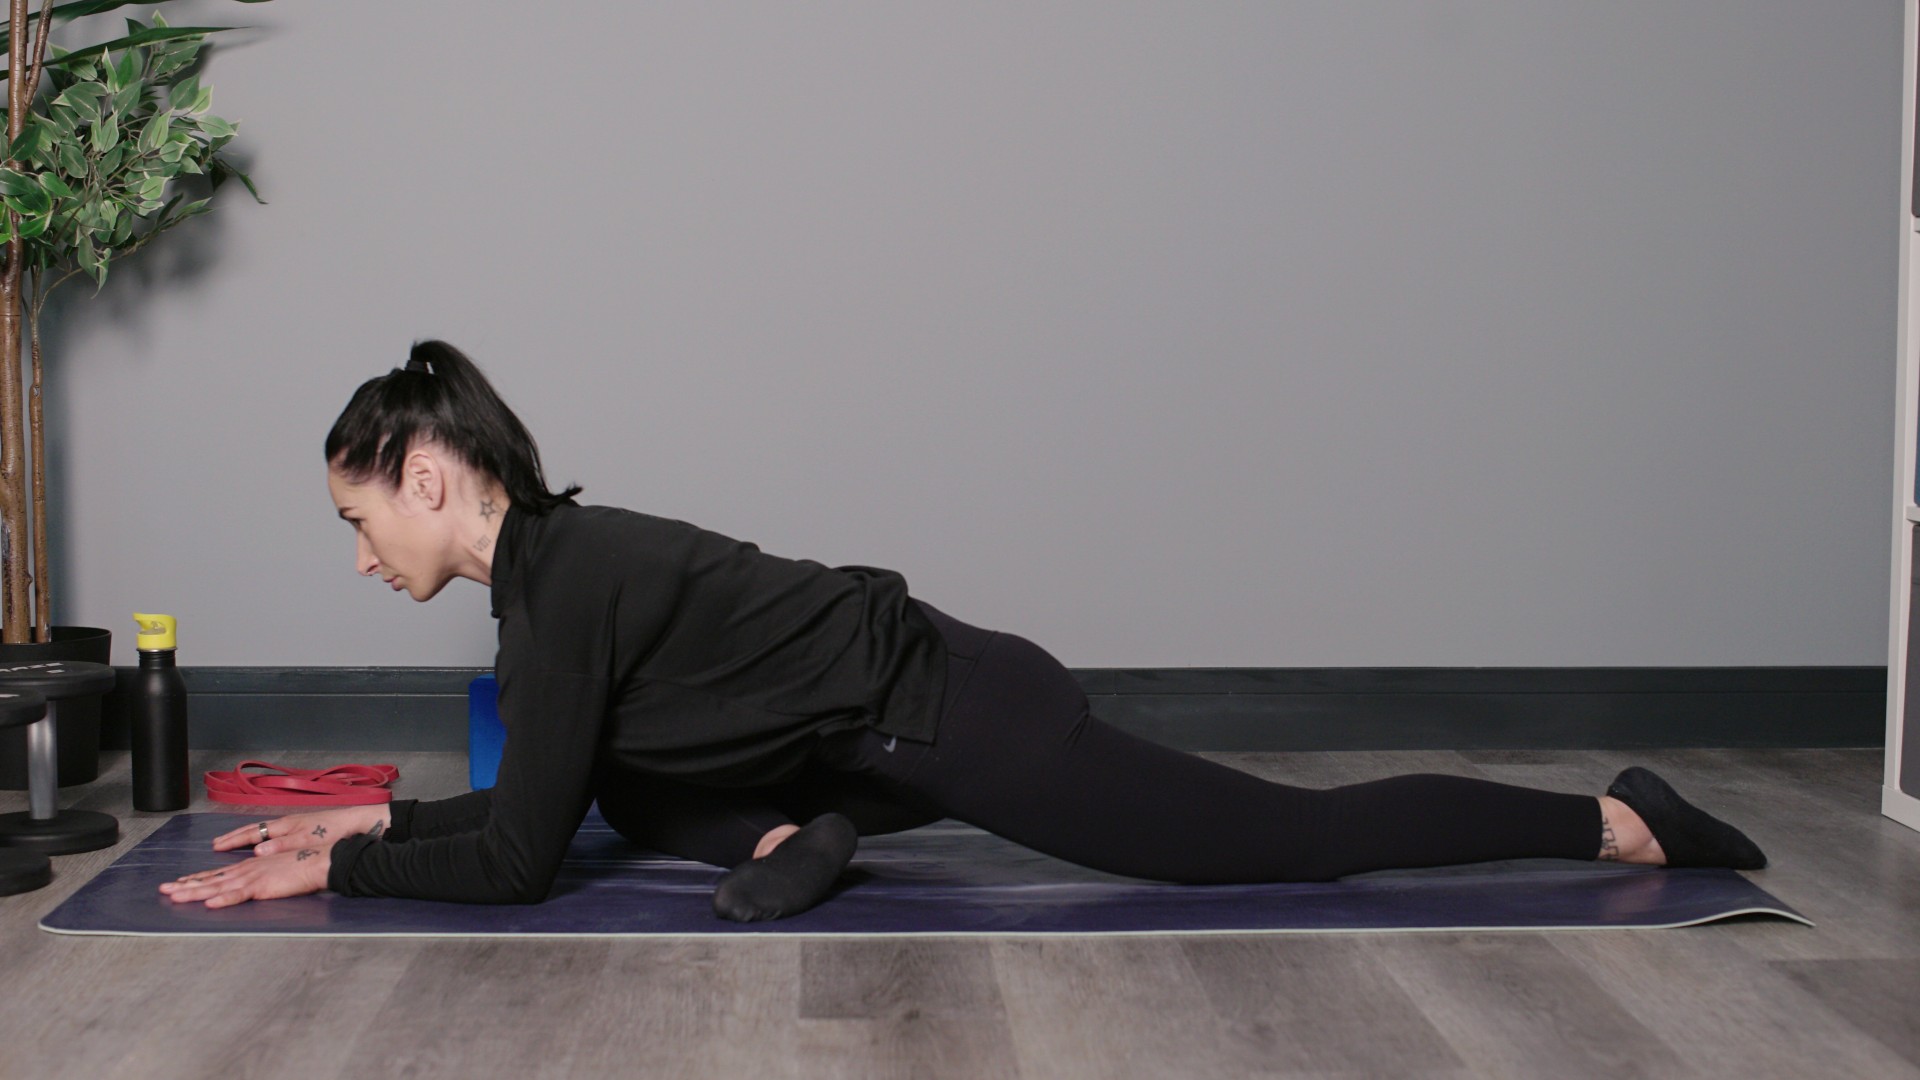
Start on your back with both feet grounded on the mat and knees bentLift your right leg and place the right foot just above your left knee to create a figure-4 shape with your legsHold the stretch, or lift your left leg away from the mat and draw your thigh toward you. If you can, catch behind your left leg with both hands and gently pull your thigh closerKeep your back resting on the mat, including your head and shouldersHold for 30 seconds, then release and switch sides.2. Humble pigeon pose
I love humble pigeon pose.
(Image credit: Future)
“I love humble pigeon pose,” Jess Downey tells me, who loves all things running and is a senior fitness writer for Tom’s Guide.
You may like
Rightly so, humble pigeon pose is great for runners as it targets the glutes, hip flexors, groin and adductors (inner thighs), and can even relieve low back tension as you fold forward. These are all muscle groups integral to running and forward propulsion. If pigeon pose is off the table for you, try the similar 90-90 stretch instead, which takes some pressure off your knee joints.
Unlike regular pigeon pose, which keeps the body upright for a deeper stretch in the hip flexor and lower back, humble pigeon involves folding forward over your leg and hits the glutes harder. Your glutes are VIP muscles when you run, squat and lunge.

Jess Downey
Senior fitness writer
Jess Downey is also an avid runner and a senior writer at Tom’s Guide. Jessica is passionate about testing fitness gear and tech, using her reviews to help readers make informed buying decisions while getting outdoors as much as she can in sunny Scotland.
Start in a downward dog positionLift your right leg high behind you, then draw your right knee forward toward your right wristPlace your right knee on the mat near your right hand and lower your shin. Your foot will be behind your left wristSlide your left leg back, resting on the top of the left knee. Square your hips to the front of the matFlex your right foot to protect your knee. You can move your right foot closer to your body (easier) or further away to create a right angle (harder)Slowly hinge at the hips and fold forward over your front leg for a deeper stretch. Maintain a long, straight spineHold for 30 seconds, then switch sides.3. Yogi squat knee taps
This deep squat opens the hips and mobilizes the knees and ankles.
This deep yogi squat opens the hips and mobilizes the knees and ankles, working the entire lower body, including the quads, hamstrings and glutes. Rolling from one foot to the other improves ankle mobility and activates your calves, which are referred to as the second heart in your body!
For some extra spice, see if you can drive your knee forward and tap it onto the ground in front of you, then roll back into your squat and change sides, alternating from knee to knee.
Stand with your feet slightly wider than shoulder-width apart, then sit your hips back and lower into a low squatKeep your back straight (no hunching) and chest proud, shoulders pulled backYou can hook your elbows between your knees to help push your knees in line with your toesBegin rolling from heel to heel to massage into the hipsIf you want a challenge, lean your weight forward slightly, then tap your knee onto the mat in front of you with controlRoll back into your squat and plant your heels down, then switch sides and draw the other knee forward.4. Glute bridge x butterfly glute bridge
I do a lot of bridges…
“There are almost no exercises I can actually do, my hips are so tight (but) I do a lot of bridges,” says our keen runner, Nick. Glute bridges are seen as a glute exercise, hence the name, but they also stretch the hip flexors and lightly engage your core muscles and hamstrings.
You can rest on your toes and lift your heels to activate your calves, or rest on your heels to target the hamstrings. Walking your feet further away will also help engage your hamstrings.
The best way to make glute bridges harder for extra hip work is to open your knees and roll onto the knife edges of your feet into a butterfly stretch position. This opens the groin and inner thighs and changes the emphasis to the outer glutes.
Add a resistance band above your knees, a block between your thighs, or a weight across your hips to make this move even more challenging.

Nick Harris-Fry
Senior fitness writer
Nick is a keen runner and also the founder of the YouTube channel The Run Testers, which specializes in reviewing running shoes, watches, headphones and other gear. Nick is always looking for ways to strengthen his legs, build mobility and work his core to support his running feats.
Lie on your back with your lower back resting on the mat, knees bent and feet hip-width apartRest your arms alongside your hipsChoose your foot position (as above), then lightly engage your core musclesPress through your heels and hips and lift your butt away from the ground, driving your hips toward the ceilingStop when you create a straight line between your knees and shoulders and keep your chin tucked toward your chestSqueeze your glutes and pause, then slowly lower your butt toward the mat again.

Follow Tom’s Guide on Google News and add us as a preferred source to get our up-to-date news, analysis, and reviews in your feeds.
More from Tom’s Guide![]()
Back to Yoga Mats
SORT BYPrice (low to high)Price (high to low)Product Name (A to Z)Product Name (Z to A)Retailer name (A to Z)Retailer name (Z to A)![]()
Show more

 – Fitness For Every Goal")


